
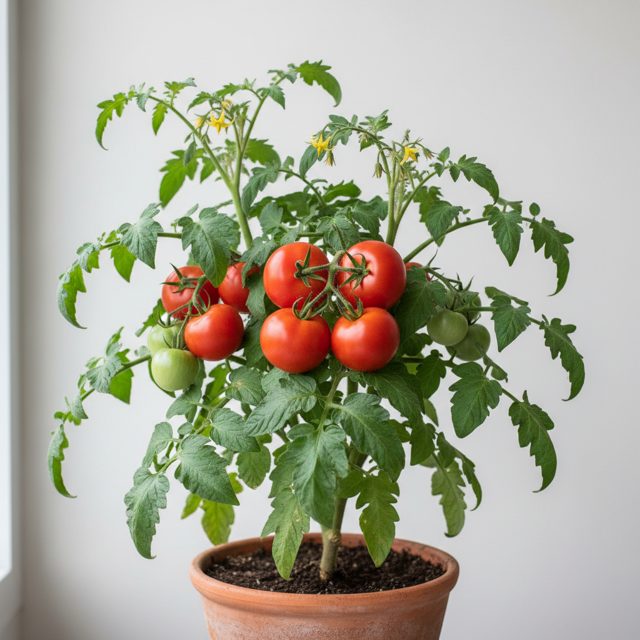
Fresh, juicy tomatoes straight from your own 'garden' are a culinary delight unmatched by store-bought produce. For those with limited space, a small yard, or even just a balcony, growing tomatoes in containers offers a fantastic solution. With the right approach, you can enjoy a continuous supply of these versatile fruits all summer long. This comprehensive guide will walk you through every step, ensuring your container tomatoes thrive.
1. Choosing the Right Tomato Variety
Not all tomato varieties are equally suited for container life. While large, indeterminate varieties (those that keep growing and producing until frost) can be grown in very large containers, determinate and 'bush' varieties are generally more manageable and productive for pots. Determinate plants grow to a specific height, produce their fruit all at once, and then stop, making them ideal for container culture where space is at a premium. Dwarf and patio varieties are specifically bred for compact growth and are excellent choices.
Consider cherry tomatoes like 'Sungold' or 'Patio Princess' for prolific yields and sweet flavor, or 'Bush Goliath' and 'Celebrity' for larger, slicing tomatoes. Read seed packets or plant tags carefully to understand the plant's mature size and growth habit before making your selection. If you're unsure about a plant's type or care needs, a quick scan with the PlantBetter app can often provide instant identification and crucial growing information.
2. Selecting the Perfect Container and Potting Mix
The right container is crucial for healthy container tomatoes. Aim for a pot that is at least 15-20 gallons (approximately 18-24 inches in diameter) for indeterminate varieties and a minimum of 5-10 gallons (12-16 inches) for determinate or bush varieties. Larger is generally better, as it provides more room for root development, holds more moisture, and offers greater stability. Materials like terracotta, plastic, fabric grow bags, or even repurposed buckets (with drainage holes) all work well. Ensure your chosen container has ample drainage holes to prevent waterlogging, which can lead to root rot.
Never use garden soil in containers, as it compacts easily, drains poorly, and can introduce pests and diseases. Instead, invest in a high-quality, lightweight potting mix specifically formulated for containers. Look for mixes that contain perlite, vermiculite, or coir to improve aeration and drainage while retaining adequate moisture. Some mixes also include slow-release fertilizers, which can give your plants a good start. You can also mix in some compost (about 10-20% of the total volume) to boost nutrients and microbial activity.
3. Planting and Initial Care
When planting, dig a hole large enough to accommodate the root ball. Tomatoes benefit from being planted deeply; if your seedling is leggy, remove the lower leaves and plant it so that at least two-thirds of the stem is buried. New roots will sprout from the buried stem, leading to a stronger root system. After planting, thoroughly water your tomato plant until water drains from the bottom of the pot. Place your container in a location that receives at least 6-8 hours of direct sunlight per day – tomatoes are sun-lovers!
Staking or caging is essential for most tomato varieties, even many determinate ones, to support the heavy fruit load and prevent stems from breaking. Install stakes or cages at the time of planting to avoid damaging the roots later. For taller varieties, use sturdy stakes or a robust tomato cage. As the plant grows, gently tie the main stem to the support using soft ties or clips. This support system will also help keep the fruit off the ground, reducing the risk of disease and improving air circulation.
4. Watering and Fertilizing Strategies
Container tomatoes require more frequent watering than their in-ground counterparts because pots dry out faster. The key is consistency: aim to keep the soil consistently moist, but not waterlogged. Check the soil moisture daily by sticking your finger about an inch or two deep. If it feels dry, it's time to water. During hot weather, you may need to water once or even twice a day. Early morning is the best time to water, allowing the foliage to dry before nightfall, which helps prevent fungal diseases. Avoid overhead watering if possible; water at the base of the plant.
Tomatoes are heavy feeders. Beyond what's in your potting mix, they'll need additional nutrients throughout the growing season. Begin fertilizing once flowers start to appear, typically with a balanced liquid fertilizer (e.g., 5-10-10 or 3-4-6) every two weeks, or according to product instructions. Once fruits begin to set, switch to a fertilizer higher in potassium (the last number in the NPK ratio) to encourage fruit production and quality. Always follow recommended dilution rates to avoid over-fertilizing, which can burn roots or promote excessive foliage growth at the expense of fruit.
5. Pruning and Pest Control
While determinate varieties require minimal pruning, indeterminate tomatoes benefit from 'suckering' – removing the small shoots that grow in the V-shape between the main stem and a leaf branch. Pinching these out directs the plant's energy into fruit production rather than excessive foliage. However, avoid over-pruning, as the leaves are essential for photosynthesis and protecting ripening fruit from sunscald.
Keep an eye out for common tomato pests like aphids, hornworms, and whiteflies. Regularly inspect your plants, especially the undersides of leaves. For minor infestations, a strong spray of water or hand-picking can be effective. Organic pest control methods like neem oil or insecticidal soap can be used for more persistent problems. Good air circulation and consistent watering practices also help deter fungal diseases. Should you spot any unfamiliar pests or signs of disease, PlantBetter can assist with identification, helping you take swift action to protect your harvest. Don't forget to set watering and fertilizing reminders in PlantBetter to ensure consistent care.
6. Harvesting Your Bountiful Crop
The most exciting part! Tomatoes are ready to harvest when they are fully colored and firm to the touch. Gently twist or snip the fruit from the vine, leaving a small piece of the stem attached if possible, as this can help them last longer. Don't pull too hard, as you might damage the plant or surrounding fruit. Check your plants daily once they start ripening, as tomatoes can go from ripe to overripe very quickly, especially in warm weather. Harvesting regularly also encourages the plant to produce more fruit.
Store ripe tomatoes at room temperature, never in the refrigerator, as cold temperatures can diminish their flavor and texture. Enjoy your homegrown tomatoes fresh in salads, sandwiches, sauces, or simply savored on their own. The flavor of a sun-ripened, homegrown tomato is a true testament to your gardening efforts and makes all the work worthwhile.
Key takeaway
Growing delicious tomatoes in containers is entirely achievable with proper variety selection, consistent care, and a little attention to detail. Follow these steps for a season full of fresh, flavorful harvests, even in the smallest of spaces.
Let PlantBetter help
PlantBetter identifies your plant from a photo and builds a care plan with reminders, so you always know what it needs next.